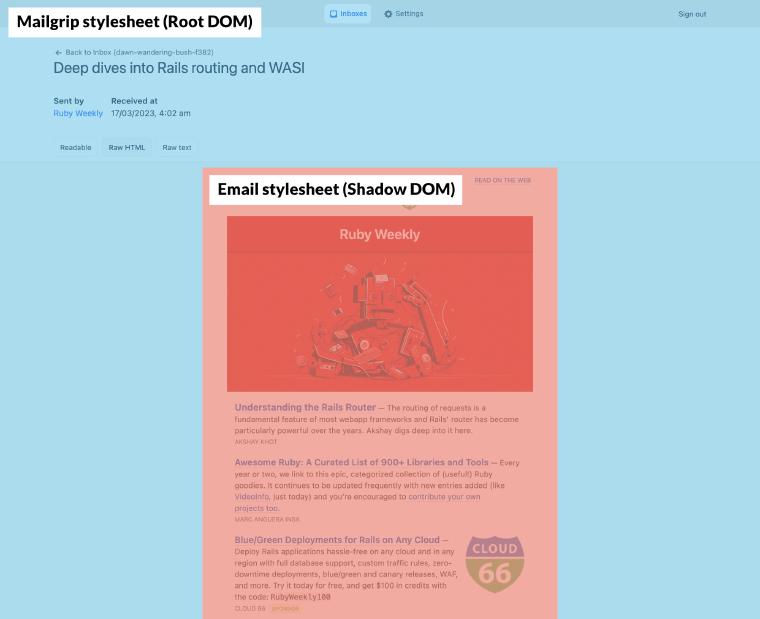
Recently, I worked on embedding HTML emails into a web page for Mailgrip. I’d done something similar in the past using iFrames, but this time used the Declarative Shadow DOM instead. It resulted in a much easier implementation, with less reliance on client-side JavaScript.
This post provides an introduction to the Declarative Shadow DOM, and how it compares to the regular ol’ Shadow DOM.

Why not just insert the email’s HTML into the page?
First, an aside about the obvious anti-pattern here; taking the email’s HTML and inserting it as-is into the web page.
This would be very unreliable. Emails come with their own CSS styles (some inline, some via stylesheets) which would clash with the styles on the host page they’re being embedded into. Likewise, styles from the host page would cascade down into the email and style it in an undesired way.
So… enforcing separation between the email’s DOM and CSS and those of the host page’s is really really necessary.
Enter the Shadow realm DOM
Shadow DOM is a web standard that allows you to attach a self-contained DOM tree to an existing DOM tree. Styles in the Shadow DOM’s tree are totally separate from those on your host page, so it’s perfect for embedding HTML emails.
Typically to create a Shadow DOM you’d have to use JavaScript, and it’d look something like this:
<html>
  <head>
    <title>Host page</title>
    <style>
      * {
        background-color: lightblue;
        font-family: serif;
      }
    </style>
  </head>

  <body>
    Host page content.

    <div id="host"></div>

    <script>
      const hostElement = document.getElementById("host");
      const shadowRoot = hostElement.attachShadow({ mode: "open" });

      // Whatever CSS styles you apply won't cross the boundary between the host
      // page and the Shadow DOM.
      shadowRoot.innerHTML = `
        <h1>Inner content (DOMception)</h1>
        <style>
            * {
                background-color: salmon;
                font-family: monospace;
            }
        </style>
        `;
    </script>
  </body>
</html>
So, in this implementation we:
- Create our host page, which includes a container element to host the shadow DOM
id="host"in this case, - Designate that element as the root of the Shadow DOM by using
Element.attachShadow(), - Add content and styles to the shadow root by assigning
innerHTML(for simplicity. Any DOM manipulation function would work).
… and that all comes together into a page that looks like this:

The blue-ish parts are the host DOM, and the salmon-ish parts are in the Shadow DOM.
Note how the monospace styles from inside the Shadow DOM’s stylesheet don’t leak outside of its bounds.
(This is a very simplified example. Check out the MDN docs to go deeper.)
What does the Declarative Shadow DOM add?
It takes the Shadow DOM you already know and love and makes it more… declarative.
That means you can specify a shadow DOM directly in your existing HTML, without relying on JavaScript. This is a huge boon for simplicity, and a plus for server-side rendered apps that try to use as little JavaScript as possible (like Mailgrip).
Using Declarative Shadow DOM, the example from above becomes:
<html>
  <head>
    <title>Host page</title>
    <style>
      * {
        background-color: lightblue;
        font-family: serif;
      }
    </style>
  </head>

  <body>
    Host page content.

    <div id="host">
      <template shadowrootmode="open">
        <h1>Shadow DOM content (DOMception).</h1>

        <style>
          * {
            background-color: salmon;
            font-family: monospace;
          }
        </style>
      </template>
    </div>
  </body>
</html>
No more JavaScript here, but same result.
Simply specifying a <template> element with the shadowrootmode attribute instructs the browser’s HTML parser that the children of that node should be part of a Shadow DOM tree.
(This too is a very simplified example. Check out the Chrome Developers article on Declarative Shadow DOM to learn more.)
What’s browser support like?
Ehh… not great yet. Shadow DOM itself has been around for a while and is well supported, but as of March 2023, Declarative Shadow DOM is a fresh feature that only works on Chrome.
The good news is there’s a very straight-forward polyfill you can use to add support to all modern browsers:
document.addEventListener("DOMContentLoaded", () => {
  polyfill();
});

function polyfill() {
  // Polyfill Declarative Shadow DOM
  // https://developer.chrome.com/articles/declarative-shadow-dom/#polyfill
  (function attachShadowRoots(root) {
    root.querySelectorAll("template[shadowrootmode]").forEach((template) => {
      const mode = template.getAttribute("shadowrootmode");
      const shadowRoot = template.parentNode.attachShadow({ mode });
      shadowRoot.appendChild(template.content);
      template.remove();
      // Recursive, so you could have a DOM in your DOM in your DOM in your DOM!
      attachShadowRoots(shadowRoot);
    });
  })(document);
}
Overall, using this approach cut down a fair bit of complexity with embedding HTML emails on Mailgrip. Although the polyfill still requires client-side JavaScript to work, I’m looking forward to wider browser support so I can start embedding emails without any client-side code at all.