SwiftLint is a great tool for enforcing code conventions in your Swift projects.
You can use it locally while you develop, but having it run as part of your continuous integration process makes sure that any contributions made to your project are checked for good code style too.
This post will guide you through setting up SwiftLint to run locally on your machine, as well as how to integrate it with your Travis CI build process.
If you’re completely new to Travis CI, I’d recommend you read this excellent getting started tutorial first, as this guide assumes that you already have a Swift project on GitHub integrated with Travis CI.
TLDR: This GitHub repo shows an example SwiftLint + Travis CI implementation.
Let’s get SwiftLint running locally
Installing SwiftLint is dead simple, just do a $ brew update && brew install swiftlint and you should be good to go!
Once installed, you can verify that Swiftlint works by opening your terminal, cd-ing to your repo’s root directory and running $ swiftlint.
This will scan your source code and show you places where improvements can be made. Once the scan is complete you should see something like this:
$ swiftlint
Linting Swift files in current working directory
Linting 'AppDelegate.swift' (1/4)
Linting 'UIColor+RandomColor.swift' (2/4)
Linting 'ViewController.swift' (3/4)
Linting 'UIColor+RandomColorTests.swift' (4/4)
UIColor+RandomColorTests.swift:16:26: error: Force Cast Violation: Force casts should be avoided. (force_cast)
UIColor+RandomColorTests.swift:17: warning: Trailing Whitespace Violation: Lines should not have trailing whitespace. (trailing_whitespace)
Done linting! Found 2 violations, 1 serious in 4 files.
This command line output is good, but what’s even better is getting these hints inline in XCode.
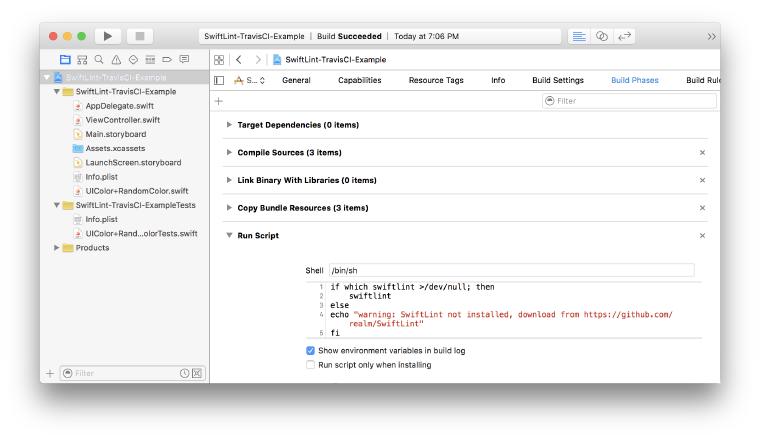
To do this you’ll need to add a new “Run Script Phase” to your XCode build process which contains the following script:
if which swiftlint >/dev/null; then
  swiftlint
else
  echo "warning: SwiftLint not installed, download from https://github.com/realm/SwiftLint"
fi

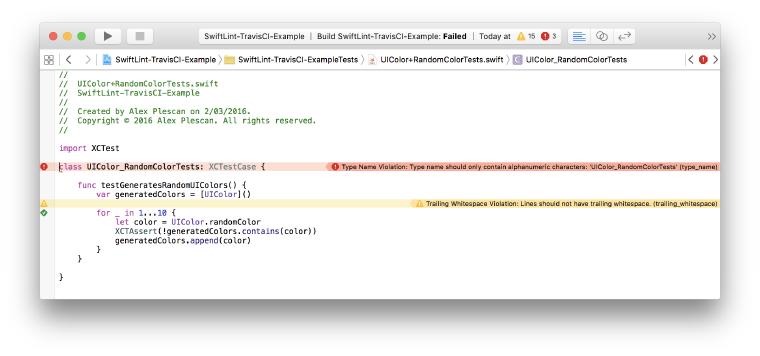
Then CMD+B to rebuild your code and you should see lint hints appear inline in XCode like this:

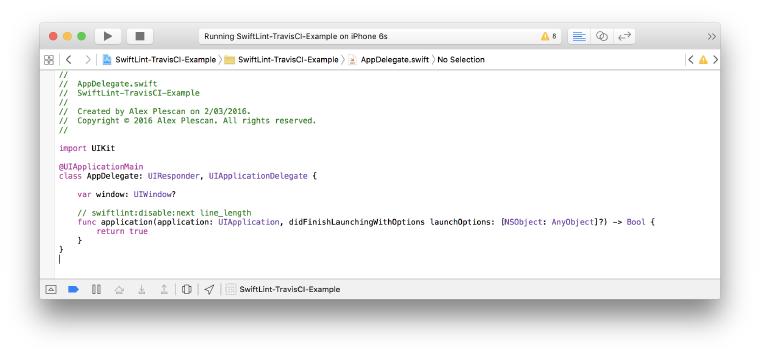
You can now go ahead and do what the hints suggest, but don’t take their advice as gospel. If you want to ignore a particular hint SwiftLint gives you several ways of doing this, outlined here. I prefer to be explicit when ignoring SwiftLint hints by adding the ignore directive inline with my code:

Installing SwiftLint on Travis CI
Now that your code has been de-linted locally, it’s time to add SwiftLint to your Travis CI build too. Since the default Mac OS X image on Travis doesn’t have SwiftLint installed, we need to install it manually before each build.
Before integrating with SwiftLint my total build time on Travis CI was around 50 seconds. I tried a few approaches to installing SwiftLint to see which would work the fastest:
# Approach 1: Installing via Homebrew
# Time to run build: 3min 18sec
$ brew update && brew install swiftlint


# Approach 2: Compiling from source
# Time to run build: 5min 16sec
$ git clone https://github.com/realm/SwiftLint.git /tmp/SwiftLint &&
  cd /tmp/SwiftLint &&
  git submodule update --init --recursive &&
  sudo make install


# Approach 3: Download and install precompiled .pkg file
# Time to run build: 1min 13sec (!!!)
$ wget --output-document /tmp/SwiftLint.pkg https://github.com/realm/SwiftLint/releases/download/0.9.1/SwiftLint.pkg &&
  sudo installer -pkg /tmp/SwiftLint.pkg -target /
Downloading and installing the precompiled pkg file was the fastest by far, only taking 23 more seconds to run the build.
So as to keep the Travis config file as clutter free as possible I created a bash script install_swiftlint.sh to handle the install. In the unlikely situation that the SwiftLint.pkg file isn’t available for download I’ve included a fallback which compiles SwiftLint from source:
#!/bin/bash

# Installs the SwiftLint package.
# Tries to get the precompiled .pkg file from Github, but if that
# fails just recompiles from source.

set -e

SWIFTLINT_PKG_PATH="/tmp/SwiftLint.pkg"
SWIFTLINT_PKG_URL="https://github.com/realm/SwiftLint/releases/download/0.9.1/SwiftLint.pkg"

wget --output-document=$SWIFTLINT_PKG_PATH $SWIFTLINT_PKG_URL

if [ -f $SWIFTLINT_PKG_PATH ]; then
  echo "SwiftLint package exists! Installing it..."
  sudo installer -pkg $SWIFTLINT_PKG_PATH -target /
else
  echo "SwiftLint package doesn't exist. Compiling from source..." &&
  git clone https://github.com/realm/SwiftLint.git /tmp/SwiftLint &&
  cd /tmp/SwiftLint &&
  git submodule update --init --recursive &&
  sudo make install
fi
Once you create that script, make sure to do a $ chmod u+x install_swiftlint.sh to give execute permissions execute permissions it. If you don’t do this the Travis build will crash.
Open up your .travis.yml config file and update it to call our SwiftLint install script by adding these lines:
install:
  - ./install_swiftlint.sh

script:
  - swiftlint
You can see the script parameter has a new swiftlint call added to it, and the install parameter adds a call to our shell script install_swiftlint.sh.
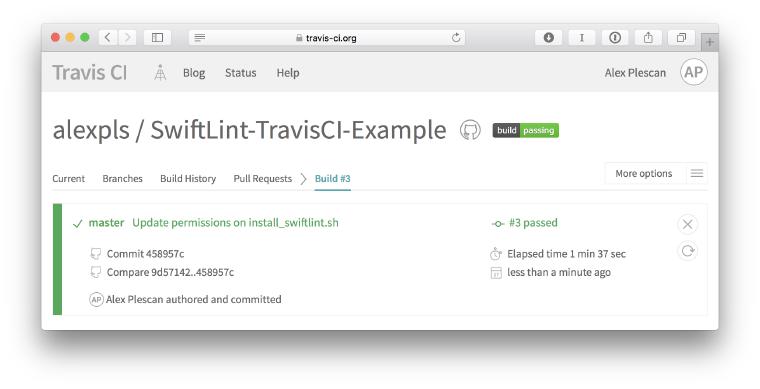
It’s time to commit and push! The new Travis CI build should appear immediately, but may take a few minutes to start up. If all goes well it should exit with a 0 status and happy green color!

Example code
I’ve set up an example repo on GitHub which shows shows this method of running SwiftLint. Check it out here.